
[ad_1]
Big biceps. For some lifters, that’s the ultimate weightlifting goal. Not winning gold medals in competition or hoisting hundreds of pounds overhead. Just building some eye-catching sleeve-stretchers. And, frankly, there’s not a thing wrong with that.
Changing your physique to suit your own goals, and building muscle for muscle’s sake, is still perfectly acceptable, despite the recent prevalence of functional training, obstacle racing, or performance-driven workouts. Nevermind the fact that directly training your biceps can contribute to joint health and may actually boost performance in many lifts. So, in the spirit of getting big ol’ arms, here are some of the best ways to grow your biceps.
12 Best Biceps Exercises
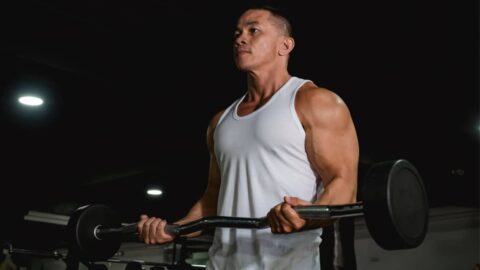
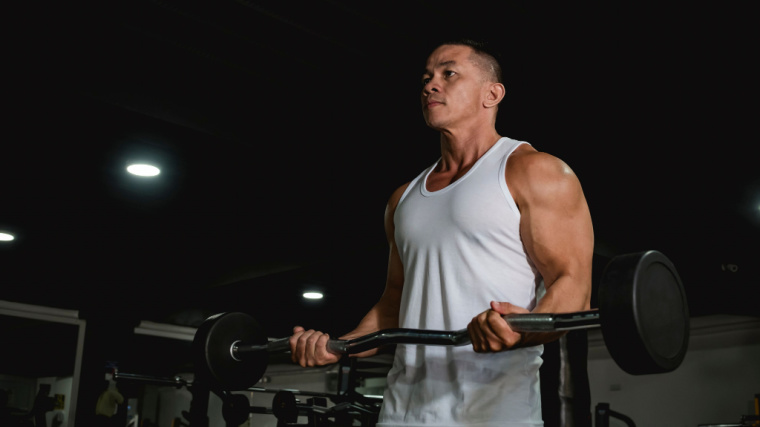
Cheat Curl
Performing the cheat curl is doing the wrong thing for the right reason. Instead of a strict barbell curl, which can be effective on its own, you’re deliberately using some body English to drive a heavy weight to the top position and then controlling the eccentric (negative or lowering phase).
By using your hips and legs purposefully to lift the weights, rather than accidentally loosening technique due to fatigue, you remain in control of the exercise and reduce the risk of injury while benefiting from heavier weights and increased muscle tension.
How to Do the Cheat Curl
Stand with an underhand, shoulder-width grip on a barbell. Slightly bend your knees and push your hips toward the wall behind you. Keep your back straight and slide the bar down along your thighs. Forcefully straighten your body while curling the weight toward chin-level. Brace your abs in the top position and slowly lower the weight. Keep your elbows pinned to your sides while straightening your arms.
Repeat the entire process for each repetition. Be sure to use your legs and hips to drive the weight up, not simply your hips and lower back. Take roughly three seconds, or longer, to lower the weight on each repetition.
Benefits of the Cheat Curl
- The hip drive and increased muscle recruitment allows relatively heavier weights to be used, which can contribute to building size and strength.
- Lowering the weight slowly can help to build more muscle than lowering at a faster speed. (1)
EZ-Bar Curl
The EZ-bar allows a semi-supinated (angled) grip, which reduces the wrist strain many lifters from using a fully supinated (palms up) grip on a straight barbell. The shift in hand position also affects muscle recruitment by activating more forearm musculature than a straight bar.
The multiple sections of an EZ-bar also allows you to easily change your grip width from “wide,” to “moderate,” to “close.” Grip width will affect your effective range of motion, which will influence muscle activation.
How to Do the EZ-Bar Curl
Stand with a shoulder-width, underhand grip on the bar. Pull your shoulders back and keep your torso upright. Slightly bend your knees and set your stance to a comfortable width. Keep your elbows stationary as you curl the weight toward the front of your shoulders. Pause briefly before lowering the weight to full extension.
Benefits of the EZ-Bar Curl
- The EZ-bar increases brachioradialis activation compared to many other biceps exercises. (2)
- The angled hand position reduces stress on the wrist joint, making the exercise more comfortable for lifters with mobility problems or joint issues.
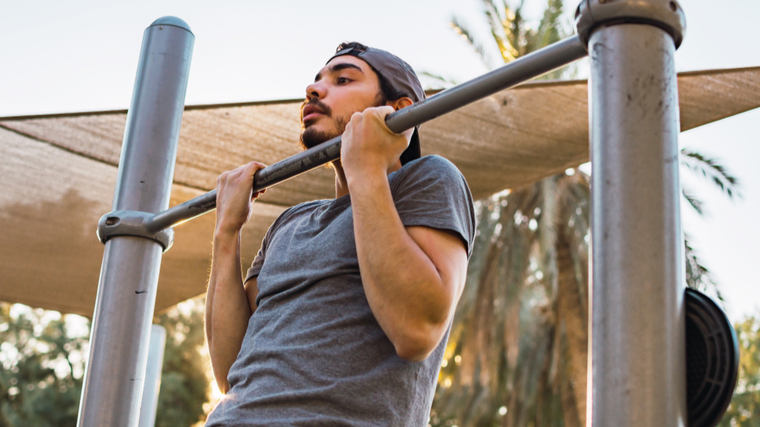
Chin-Up
Many lifters consider the chin-up to be primarily a back exercise, but the supinated (palms up) grip drastically increases biceps recruitment during the exercise. This makes it ideal for a biceps-focused workout, especially if it’s preceded or followed with additional direct biceps training to increase cumulative fatigue on the muscle.
By flipping your grip, you increase the leverage for your biceps to contribute during the movement, which places more stress directly on them and relatively less stress on the larger back muscles.
How to Do the Chin-Up
Grab an overhead pull-up bar with a shoulder-width, palm-up grip. Allow your body to be supported by your straight arms. Pinch your shoulder blades together as you pull your body toward the bar. Keep your neck in a neutral position and avoid extending your chin to the bar. When your mouth is roughly level with the bar, pause briefly before lowering your body to full extension.
Benefits of the Chin-Up
- The chin-up is one of relatively few compound (multi-joint) exercises which primarily work the biceps. Compound movements are highly effective at building strength and size (3)
- This movement allows for using potentially heavy weights compared to other biceps exercises, which is beneficial for size and strength.
Alternating Supinating Curl
This exercise puts a twist — pun completely intended — on the classic dumbbell curl to deliver increased muscle recruitment. Supinating, or rotating, your hand as you curl the weight up allows you to activate additional arm muscles and it works the biceps to their fullest capacity.
Each repetition takes your arm through a significant range of motion and complete muscle contraction by turning the wrist from a neutral position to a fully supinated (palm up) position, which maximally recruits the muscles of the biceps and forearm.
How to Do the Alternating Supinating Curl
Stand holding a pair of dumbbells by your sides with your palms facing your hips. Curl one arm upwards, keeping your thumb up in a neutral position. As your hand passes your ab-level, begin rotating to a palm-up position as you continue curling. In the top position, your pinky should be slightly higher than your index finger. Reverse the motion to lower the weight, and then perform a repetition with the opposite arm.
Benefits of the Alternating Supinating Curl
- The biceps muscle plays a significant role in supinating the forearm as well as flexing (bending) your arm. (4) This is one of the very few exercises to specifically incorporate the supinating function, which increases overall activation of the biceps.
- Using a neutral grip in the initial portion of the exercise recruits the brachialis and brachioradialis, making the alternating supinating curl an efficient way to train the biceps and forearms.
- Alternating arms and performing the movement unilaterally (curling one arm at a time) allows you to use a slightly heavier weight than curling both dumbbells together. (5)
Barbell Spider Curl
The barbell spider curl works the biceps from a unique angle for a variation in training stimulus. This is essentially a “reverse incline curl,” because it requires lying chest-down on an incline bench and allowing your arms to hang vertically down.
By positioning your upper arm in front of your torso, the short head of the biceps is more strongly recruited than the long head. Some lifters may not notice a significant difference in the development of either head, but for physique-conscious lifters, emphasizing either biceps head can play a significant role in building an aesthetic physique.
How to Do the Barbell Spider Curl
Set an incline bench to a low-to-moderate angle, roughly 30 or 45-degrees. Lie your chest on the bench while holding a barbell with a supinated (palm up) grip at roughly shoulder-width. Let your arms hang straight toward the ground. Curl the weight without moving at the shoulder. Your upper arms and elbows should remain pointed at the ground as the weight moves. Pause briefly in the top position to maximize the peak contraction. Lower slowly with control and avoid swinging the weight.
Benefits of the Barbell Spider Curl
- The short head of the biceps is recruited relatively more than the long head due to the position of the upper arm relative to the torso. The long head is involved in working the shoulder joint, which is essentially “immobilized” due to hanging straight down.
- The barbell spider curl creates an extremely strong peak contraction due to the angle of the bench and the leverage of the weight against gravity. This can help many lifters improve the mind-muscle connection with their biceps, which can ultimately benefit muscle growth. (6)(7)
Incline Dumbbell Curl
The incline dumbbell curl is a classic bodybuilding exercise, known for its unique angle which puts the biceps and shoulder into a stretched position and increases recruitment of the long head of the biceps.
While the stretched position is essential for the incline curl, it may be stressful on your shoulder joint. You can adjust the incline as needed, higher or lower, to accommodate your own mobility and flexibility. The key is to maintain bench-contact with your head, shoulder blades, and lower back to ensure an inclined position.
How to Do the Incline Dumbbell Curl
Lie back on an incline bench set to roughly 45-degrees with a dumbbell in each hand. Keep your head, shoulders, and tailbone against the bench throughout the entire movement. Straighten your arms and rotate your palms forward. Keep your palms facing up as you curl both weights toward your biceps. Your elbows should remain pointed to the floor and should not move forward. Slowly lower the weights to a full stretch.
Benefits of the Incline Dumbbell Curl
- Training the biceps with a unique angle, in an inclined position, contributes to more muscle growth than performing exercises which are too similar to one another. (8)
- The incline dumbbell curl puts the shoulder into a stretched position. Because the long head of the biceps crosses over the shoulder joint and is involved in shoulder flexion, this curl variation emphasizes the long head more than the short head. (9)
- The stretched position of the arm can contribute to improved shoulder mobility and biceps tendon strength. (10)
Single-Arm Preacher Curl
The barbell or EZ-bar preacher curl is a time-tested muscle-builder, but performing the exercise with one arm at a time can allow even greater focus on the muscle. Unilateral (single-side) training will improve muscle recruitment and emphasize on each arm more than a barbell exercise.
The upper arm support and stationary shoulder position de-emphasize the long head of the biceps and increase recruitment of the short head.
How to Do the Single-Arm Preacher Curl
Start with a dumbbell curled to your shoulder, with your palm facing your body. Press your chest against the flat side of a preacher curl bench and rest both underarms snugly on top of the pad. Lay your elbow and triceps on the angled side of the bench, keeping the dumbbell in the top position. Maintain a palms-up grip as you slowly lower the weight. When your arm is nearly straight, curl the weight back to the starting position.
Benefits of the Single-Arm Preacher Curl
- The preacher curl bench supports the upper arm which reinforces strict technique and limits cheating or momentum.
- The single-arm preacher curl emphasizes the short head of the biceps.
- The unilateral movement allows lifters to address common muscle asymmetries between arms by focusing on each arm individually.
Single-Arm Low Cable Curl
The low cable pulley puts the biceps under constant tension, compared to barbells or dumbbells which rely on gravity and leverage to provide resistance. This results in cables offering greater time under tension and a stronger muscle-building stimulus. (11)
The single-arm low cable curl can be done either facing the cable stack or facing away from it. Facing away will put a greater stretch on the biceps, similar to an incline curl, and is the more effective option.
How to Do the Single-Arm Low Cable Curl
Attack a single handle to a low cable pulley. Grab the handle, turn your back to the weight stack, and take one or two small steps forward. With a palms-up grip and your hand by your side, your straight arm should be very slightly “pulled” behind your torso by the weight. Keep your elbow stationary while curling the handle toward your shoulder. From the top position, fully straighten your arm before repeating the next repetition.
Benefits of the Single-Arm Low Cable Curl
- This cable curl variation puts the muscle under constant muscular tension which can increase muscle growth.
- The long time under tension and long range of motion make the exercise highly effective with relatively light weight, making it ideal for lifters whose joints cannot tolerate heavy loads.
Concentration Curl
The concentration curl is a classic biceps exercise, often performed by beginning lifters instinctively without formal direction. It can be an extremely effective way to target the biceps with minimal recruitment of other muscles.
The setup of the concentration curl allows you to, rightfully, concentrate on the working arm during each set. Not only is the movement strictly performed by one arm at a time, but you’re looking directly at your muscle as it contracts and stretches for each repetition.
How to Do the Concentration Curl
With a dumbbell in one hand, sit on a bench or chair with your feet set well-beyond shoulder-width. Brace the triceps of the working arm near the same-side knee. Curl the weight toward your face while maintaining a palm-up grip. Don’t allow your legs or torso to swing the weight up. Slowly lower the weight to complete extension.
Benefits of the Concentration Curl
- This exercise is ideal for using the “touch training” technique — using your non-working hand to touch the working muscle during each repetition. This can improve the mind-muscle connection and may increase muscle growth. (12)
- This movement allows for strict exercise performance with little to no momentum due to the braced stance and arm support.
- The concentration curl allows variety from standard dumbbell curls without needing additional equipment like a preacher curl bench or cable pulley.
Zottman Curl
The Zottman curl, named for American strongman George Zottman, working the biceps and forearms through a variety of motions for maximum muscle recruitment. It combines a standard dumbbell curl and a reverse curl, while testing and building wrist mobility.
If you can manage the necessary coordination (which is less complicated than patting your head while rubbing your stomach), then you can build bigger, stronger arms with this efficient movement.
How to Do the Zottman Curl
Stand holding a dumbbell in each hand by your sides. Curl one arm palm-up toward your shoulder. In the top position, rotate your hand palm-down and lower the weight to full extension. Next, curl the opposite hand palm-up toward your shoulder before rotating it palm-down for the lowering phase. When you’re comfortable with the basic movement, aim to move your arms at the same time — raising one hand palm-up while simultaneously lowering the other palm-down.
Benefits of the Zottman Curl
- The Zottman curl recruits multiple muscles of the arm — including the biceps, brachialis, and brachioradialis — during the multiple phases of the exercise.
- The varied hand positions and use of supination and pronation (turning the palm up and down, respectively) will help to build overall wrist mobility and may improve wrist and elbow health.
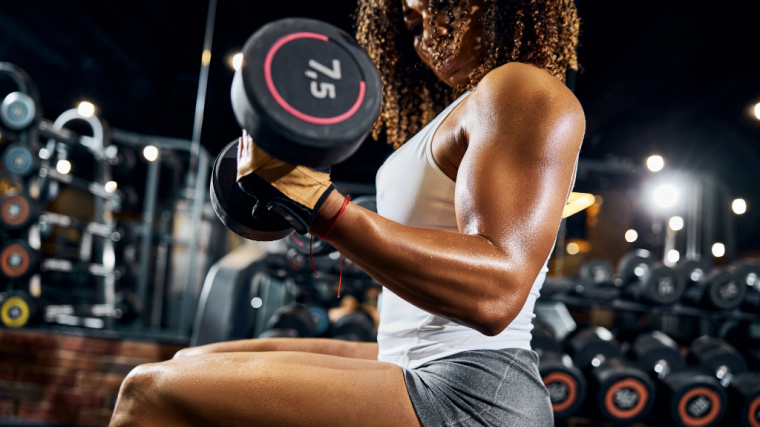
Hammer Curl
This simple adjustment to the standard dumbbell curl increases recruitment of the forearm muscles, allows you to move relatively heavier weights, and builds grip strength.
The thumbs-up position emphasizes the brachialis and brachioradialis, along with the biceps, making it an efficient way to train the forearm as well as the upper arm.
How to Do the Hammer Curl
Stand holding a pair of dumbbells at your sides with your hands facing your hips. Curl both weights up toward your shoulder while keeping your thumbs up. Allow your elbows to move slightly forward as you bring the weight into the top position — this can increase overall muscle recruitment. Pause briefly before lowering to full extension.
Benefits of the Hammer Curl
- The hammer curl allows you to lift heavier weights than any palms-up curl, which can benefit size and strength gains.
- The neutral-grip hand position emphasizes the brachialis and brachioradialis, which are not significantly recruited during other biceps curl variations.
EZ-Bar Reverse Curl
The EZ-bar reverse curl shares many of the benefits of the standard EZ-bar curl — reduced wrist strain and a consistent gauge for adjusting grip width — and it offers even greater recruitment of forearm muscles due to the angled palms-down grip.
The semi-pronated (partially palms-down) grip increases activation of the brachialis, brachioradialis, and wrist extensors, along with some recruitment of the biceps. This makes the movement a very efficient way to train the lower arms.
How to Do the EZ-Bar Reverse Curl
Stand with a shoulder-width, palms-down grip on the bar. Pull your shoulders back and keep your torso upright. Slightly bend your knees and set your stance to a comfortable width. Keep your elbows stationary as you curl the weight toward the front of your shoulders. Pause briefly before lowering the weight to full extension.
You may find the exercise more comfortable using a thumbless or “false” grip, placing your thumb next to your index finger instead of wrapping it around the bar. This technique will require greater grip strength as you squeeze the bar harder throughout the movement.
Benefits of the EZ-Bar Reverse Curl
- The combination of using an EZ-bar and a predominantly pronated (overhand or palms-down) grip significantly increases brachialis, brachioradialis, and forearm activation compared to supinated (palms-up) biceps exercises.
- The angled hand position reduces stress on the wrist joint, making the exercise more comfortable for lifters with mobility problems or joint issues.
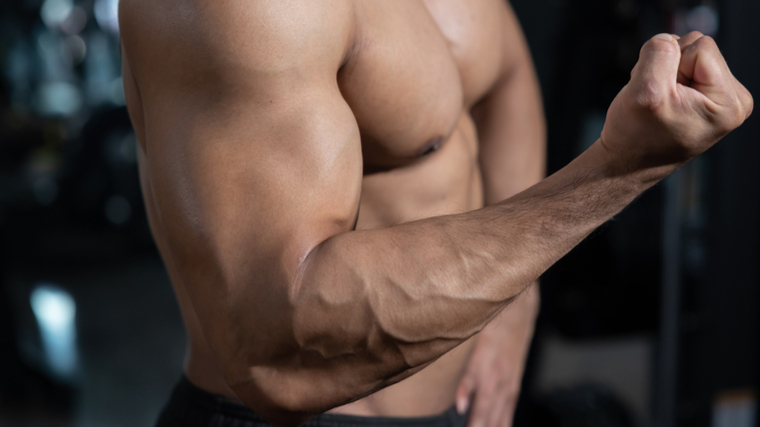
The Biceps Muscles
It sounds counterintuitive, but “the biceps” are actually just made of your biceps. Several closely related muscles in the upper and lower arm need to be developed for a great looking set of biceps.
Biceps Brachii
The primary biceps muscle on the front of the upper arm is composed of two heads working together. The short head of the biceps, sometimes called the “inner head,” runs from near the elbow to the top of the upper arm. The long head, sometimes called the “outer head,” runs from the elbow over the shoulder joint and attaches to the shoulder blade.
The biceps are well-known for working to flex (bend) your elbow, but they also function to pronate and supinate your wrist and forearm — turning your palm up and down. This is one reason why exercises like the alternating supinating curl result in stronger muscle contractions and greater overall growth.
Brachioradialis
The brachioradialis runs along the thumb-side of the forearm from the wrist area to the lower part of the biceps. It is heavily activated when curling, particularly when the hand is in a neutral (thumbs up) position. The brachioradialis also plays a role in stabilizing the forearm muscle during and after supination or pronation.
Brachialis
This often under-appreciated muscle is actually located “beneath” the biceps, near the elbow joint. When the brachialis increases in size, it has the effect of “lifting” the biceps to make it appear larger. The brachialis becomes the primary arm flexor when using a neutral grip, which is why movements like the hammer curl target it efficiently.
Forearms
The wrist flexors and wrist extensors, on the lower and upper part of the forearm respectively, are largely responsible for lifting the hand at the wrist joint. These muscles are often statically trained during most biceps curl variations, to stabilize the hand and wrist.
However, exercises like the Zottman curl or the cheat curl may recruit the flexors or extensors more significantly due to the involvement of more dynamic lifting technique.
How Often Should You Train the Biceps
Direct biceps training will be a factor of your specific goal and your overall training split. Two effective approaches are to either perform a moderate amount of biceps work immediately after training a larger body part or to perform a low amount of biceps training more frequently.
Because your biceps are recruited during almost all back exercises, ending your back workout with two or three biceps exercises (each for two to four sets of eight to 12 reps) is an efficient way to fully exhaust the biceps.
With this approach, the exercises should be as varied as possible. For example, performing the cheat curl, EZ-bar curl, and single-arm cable curl would all train the biceps with a similar stimulus. Performing the EZ-bar curl, incline curl, and Zottman curl would deliver greater variety, increased muscle recruitment, and stronger stimulus for growth.
An effective alternative is to perform one biceps exercise for two to three sets of six to 15 reps at the end of your workout three to five days per week. With this high-frequency approach, your biceps are trained often, but the low volume allows for optimal recovery and growth. (13)
The lower volume per workout also prevents biceps fatigue from interfering with your other training for other body parts. For this method to be most efficient, use different exercises and/or a different set/rep scheme in each workout. For example, perform cheat curls for four sets of six in the first workout, single-arm preacher curls for three sets of 12 in the next workout, hammer curls for three sets of eight in the next session, etc.
How to Progress Your Biceps Training
One essential element for maximizing your biceps growth is training with a variety of hand positions and arm angles, either in a single workout or throughout the week. This will optimize overall muscle recruitment and balance activation of the major arm flexors — biceps long head, biceps short head, brachialis, and brachioradialis. (14)
Be sure to incorporate “classic” palm-up curls like the barbell spider curl, palms-down curls such as the EZ-bar reverse curl, movements with your upper arm in front of your torso like the chin-up, and movements with your upper arm angled behind your torso including the incline curl.
One particularly effective technique to increase training intensity and volume is the mechanical advantage drop set. This is a specific type of superset which pairs similar movements with simple adjustments to improve leverage in order to perform more total repetitions.
For example, when you might begin with alternating supinating curls. When you approach muscular fatigue, transition immediately (without setting the dumbbells down) and begin performing hammer curls. Because hammer curls put the brachialis in a stronger position to contract, you will be able to complete additional repetitions before again reaching muscular fatigue.
Many people accidentally stumble onto this technique when performing strict barbell curls, as they inadvertently transition to cheat curls to complete a challenging set.
How to Warm-Up Your Biceps
While the elbow joint is most commonly overstressed or aggravated by certain triceps exercises, biceps training can also play a critical role in determining joint health. Because the elbow is held in position during most biceps exercises, the joint can be put under significant strain. A thorough warm-up can go a long way toward preventing any excessive stress.
Before any biceps training, get blood flowing throughout your upper body. Alternating low-rep push-ups with high-rep band pull-aparts for two or three sets is a good start. Following that with (perhaps counterintuitively), a light weight, high rep triceps exercise alternated with a light weight, high rep biceps exercise for two sets. With those four movements, you’ve got an efficient way to approach your biceps warm-up. Continue the training with a relatively light first set on each biceps exercise, and get to work.
Don’t Be Scared to Train for Big Arms
Direct biceps training has developed an unfortunate reputation in recent years, with some lifters thinking it’s purely for “vanity.” First of all, no it isn’t. Setting a goal of lean, muscular 17-inch arms isn’t “vanity” any more than setting a goal to squat five plates per side. Secondly, biceps training can play a performance-boosting role in upper body strength, stability when handling heavy weight, and shoulder, elbow, and wrist joint health. So, you want to build your biceps? Excellent. You’re now armed with the most effective ways to get there.
References
- Wilk, M., Zajac, A. & Tufano, J.J. The Influence of Movement Tempo During Resistance Training on Muscular Strength and Hypertrophy Responses: A Review. Sports Med 51, 1629–1650 (2021). https://doi.org/10.1007/s40279-021-01465-2
- Marcolin, G., Panizzolo, F. A., Petrone, N., Moro, T., Grigoletto, D., Piccolo, D., & Paoli, A. (2018). Differences in electromyographic activity of biceps brachii and brachioradialis while performing three variants of curl. PeerJ, 6, e5165. https://doi.org/10.7717/peerj.5165
- Paoli, A., Gentil, P., Moro, T., Marcolin, G., & Bianco, A. (2017). Resistance Training with Single vs. Multi-joint Exercises at Equal Total Load Volume: Effects on Body Composition, Cardiorespiratory Fitness, and Muscle Strength. Frontiers in physiology, 8, 1105. https://doi.org/10.3389/fphys.2017.01105
- Tiwana MS, Charlick M, Varacallo M. Anatomy, Shoulder and Upper Limb, Biceps Muscle. [Updated 2021 Aug 11]. In: StatPearls [Internet]. Treasure Island (FL): StatPearls Publishing; 2022 Jan-. Available from: https://www.ncbi.nlm.nih.gov/books/NBK519538/
- Costa E, Moreira A, Cavalcanti B, Krinski K, Aoki M. Effect of unilateral and bilateral resistance exercise on maximal voluntary strength, total volume of load lifted, and perceptual and metabolic responses. Biol Sport. 2015;32(1):35-40. doi:10.5604/20831862.1126326
- Calatayud, J., Vinstrup, J., Jakobsen, M. D., Sundstrup, E., Brandt, M., Jay, K., Colado, J. C., & Andersen, L. L. (2016). Importance of mind-muscle connection during progressive resistance training. European journal of applied physiology, 116(3), 527–533. https://doi.org/10.1007/s00421-015-3305-7
- Schoenfeld, B. J., Vigotsky, A., Contreras, B., Golden, S., Alto, A., Larson, R., … & Paoli, A. (2018). Differential effects of attentional focus strategies during long-term resistance training. European Journal of Sport Science, 18(5), 705-712.
- Costa B.V.D., Kassiano, W., Nunes, J. P., Kunevaliki, G., Castro-E-Souza, P., Rodacki, A., … & de Sousa Fortes, L. (2021). Does Performing Different Resistance Exercises for the Same Muscle Group Induce Non-homogeneous Hypertrophy?. International Journal of Sports Medicine, 42(09), 803-811.
- Schoenfeld, Brad CSCS. Accentuating Muscular Development Through Active Insufficiency and Passive Tension. Strength and Conditioning Journal: August 2002 – Volume 24 – Issue 4 – p 20-22
- Wiesinger, H. P., Kösters, A., Müller, E., & Seynnes, O. R. (2015). Effects of Increased Loading on In Vivo Tendon Properties: A Systematic Review. Medicine and science in sports and exercise, 47(9), 1885–1895. https://doi.org/10.1249/MSS.0000000000000603
- Burd, N. A., Andrews, R. J., West, D. W., Little, J. P., Cochran, A. J., Hector, A. J., Cashaback, J. G., Gibala, M. J., Potvin, J. R., Baker, S. K., & Phillips, S. M. (2012). Muscle time under tension during resistance exercise stimulates differential muscle protein sub-fractional synthetic responses in men. The Journal of physiology, 590(2), 351–362. https://doi.org/10.1113/jphysiol.2011.221200
- Oshita, Kazushige. (2021). Effect of internal focus of attention with touching cue on the agonist muscle activity during exercise. 10.14198/jhse.2021.16.Proc2.04.
- Schoenfeld, B. J., Grgic, J., & Krieger, J. (2019). How many times per week should a muscle be trained to maximize muscle hypertrophy? A systematic review and meta-analysis of studies examining the effects of resistance training frequency. Journal of sports sciences, 37(11), 1286–1295. https://doi.org/10.1080/02640414.2018.1555906
- Kleiber, T., Kunz, L., & Disselhorst-Klug, C. (2015). Muscular coordination of biceps brachii and brachioradialis in elbow flexion with respect to hand position. Frontiers in physiology, 6, 215. https://doi.org/10.3389/fphys.2015.00215
Featured Image: MDV Edwards / Shutterstock
[ad_2]
Source link


 Scores 4 Personal Competition Records")